I’ve always been that person who can’t walk past the jalapeño poppers at a party. They’re gone before anyone else even gets a chance. But here’s the thing—I got tired of choosing between poppers and a good grilled sausage at cookouts. Why not have both?
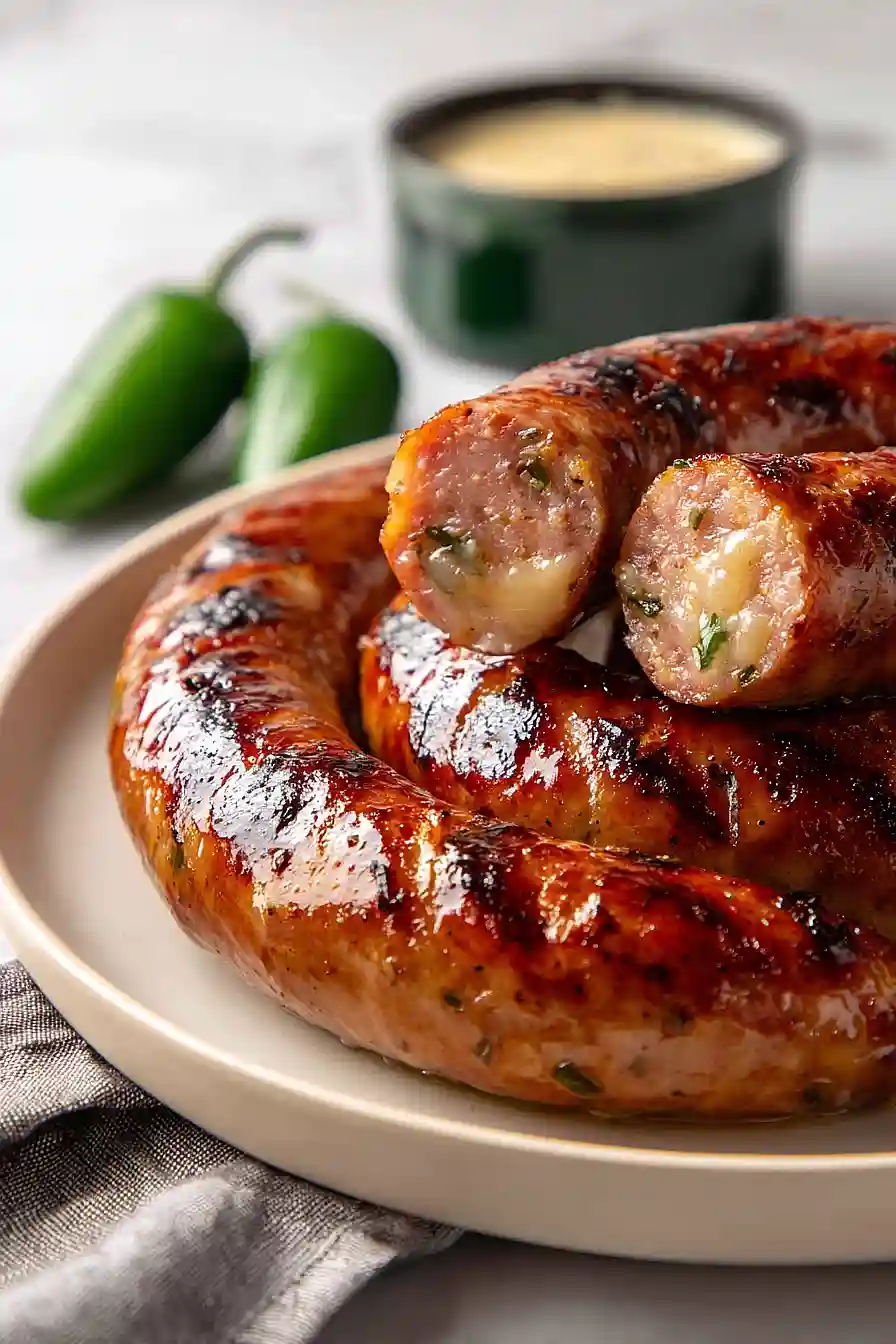
That’s how I ended up making smoked jalapeño popper sausage. It’s got everything I love about poppers—the cream cheese, the bacon, the kick from the peppers—but rolled into a sausage you can smoke and serve at your next barbecue. No toothpicks required, and no fighting over the last one on the tray.
Want something that’ll make people ask for the recipe before they’ve even finished eating? This is it. Fair warning though: you might want to make a double batch. These disappear fast.
Why You’ll Love This Smoked Jalapeño Popper Sausage
- Restaurant-quality homemade sausage – Making your own sausage at home sounds intimidating, but this recipe breaks it down into manageable steps that’ll have you feeling like a pro.
- Loaded with flavor – The combination of crispy bacon, spicy jalapeños, and creamy cheese pockets throughout the sausage creates an explosion of taste in every bite.
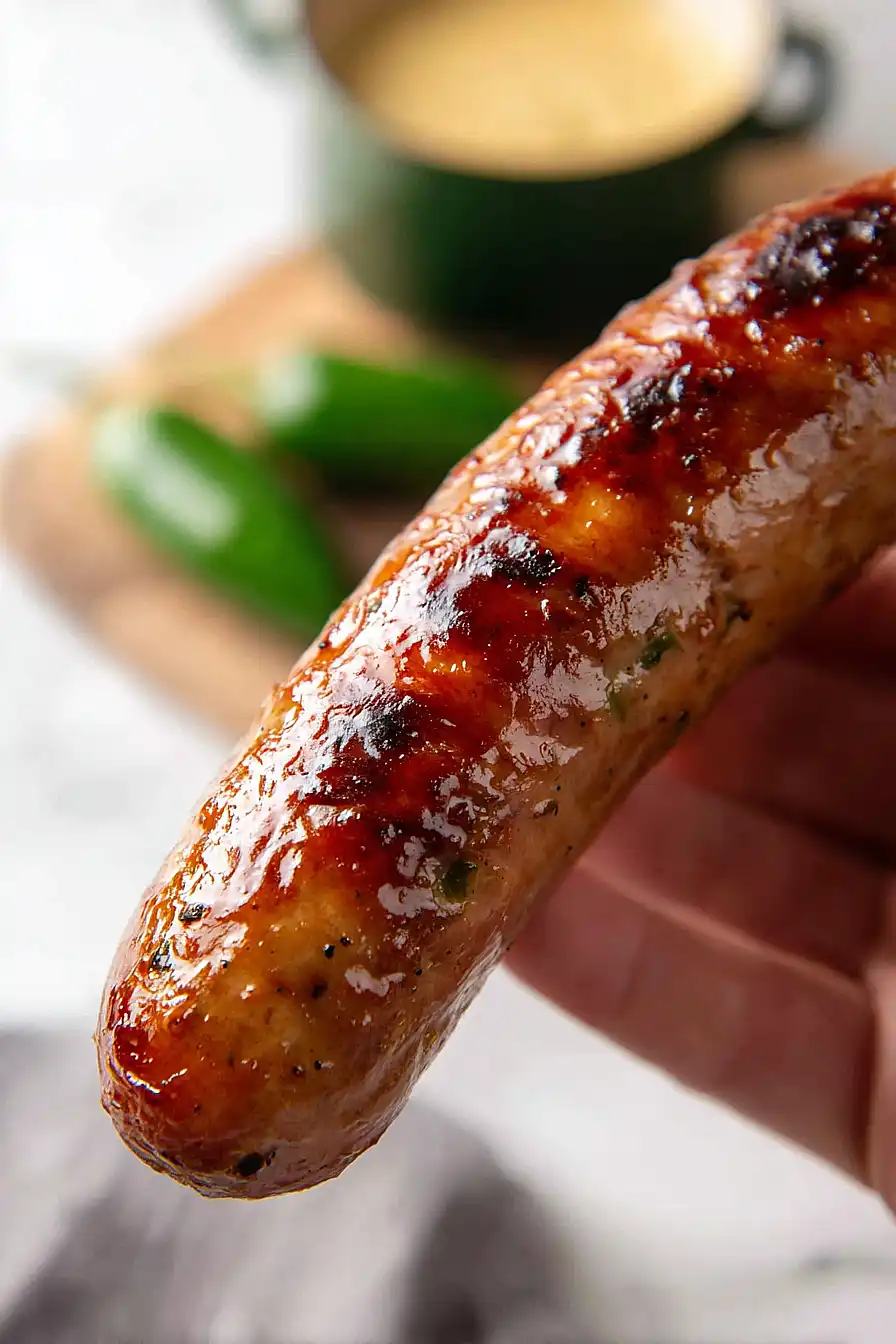
- Perfect for entertaining – These sausages are guaranteed conversation starters at your next cookout or game day gathering, and they taste way better than anything you’d buy at the store.
- Customizable heat level – You can easily adjust the amount of jalapeños and cayenne to match your spice preference, making it mild enough for everyone or extra hot for heat lovers.
- Great for meal prep – This recipe makes a good batch that you can freeze and enjoy for weeks, giving you homemade gourmet sausages whenever the craving hits.
What Kind of Jalapeños Should I Use?
For this smoked jalapeño popper sausage, you have a few options when it comes to your peppers. Fresh jalapeños work great if you roast or smoke them yourself first – just remove the seeds and membranes if you want less heat, or leave some in if you like things spicy. Canned or jarred jalapeños are also a solid choice and save you some prep time, though they’ll be a bit softer and less smoky than fresh roasted ones. If you want that authentic smoky flavor without the extra work, look for chipotle peppers in adobo sauce at the store – they’re just smoked jalapeños and will give your sausage an extra kick of flavor.
Options for Substitutions
While sausage-making requires some precision, there’s still room for a few swaps if you need them:
- Pork and beef ratio: You can adjust the meat ratio to your preference – go all pork for a milder flavor, or increase the beef for a heartier taste. Just keep the total meat weight at 700 g to maintain the right texture.
- Pork back fat: If you can’t find pork back fat, you can use pork belly (with the skin removed) or ask your butcher for pork fat trimmings. The fat is important here – don’t skip it or your sausages will be dry.
- Jalapeños: For less heat, swap in poblano peppers or mild green chiles. If you want more kick, try serranos or keep some of the jalapeño seeds in the mix.
- Cream cheese: Regular cream cheese works fine, but you could also try pepper jack cheese for extra flavor. Make sure to freeze it first and cut it into small cubes so it doesn’t melt during grinding.
- Insta cure #1: This curing salt is really important for food safety and that characteristic sausage color – don’t substitute or skip this ingredient.
- Hog casings: You can use sheep casings for thinner sausages or collagen casings if natural casings aren’t available. Just soak natural casings in water for 30 minutes before using.
Watch Out for These Mistakes While Cooking
The biggest mistake when making sausage is letting your meat and fat get too warm during grinding, which can cause the fat to smear instead of staying in distinct pieces – keep everything at 32°F-34°F and work quickly to maintain that temperature.
Don’t skip freezing the cream cheese before mixing it in, as room temperature cream cheese will melt into the meat during smoking and you’ll lose those pockets of creamy goodness that make jalapeño poppers so good.
Another common error is raising the smoker temperature too quickly, which can cause the fat to render out and leave you with dry, crumbly sausages – stick to the gradual temperature increases and resist the urge to speed things up.
Finally, skipping the ice bath after cooking means your casings can wrinkle and your sausages won’t have that nice snap when you bite into them, so make sure to shock them in ice water before letting them rest at room temperature.

What to Serve With Smoked Jalapeño Popper Sausage?
These sausages are packed with so much flavor that they really shine on their own, but I love serving them with simple sides that won’t compete with all that smoky, spicy goodness. A basic potato salad or some roasted potatoes work great because they help balance out the heat from the jalapeños. You could also throw them on a bun with some sautéed peppers and onions for a killer sausage sandwich, or slice them up and serve alongside scrambled eggs for a seriously good breakfast. If you’re firing up the grill anyway, some corn on the cob or a crisp coleslaw makes a perfect pairing too.
Storage Instructions
Refrigerate: Once your smoked jalapeño popper sausages have cooled down completely, wrap them in butcher paper or store them in an airtight container in the fridge. They’ll stay fresh for about 5-7 days, which gives you plenty of time to enjoy them throughout the week.
Freeze: These sausages freeze really well for longer storage. Wrap individual links or pairs in plastic wrap, then place them in a freezer bag with as much air squeezed out as possible. They’ll keep in the freezer for up to 3 months without losing quality.
Reheat: To warm up refrigerated sausages, just toss them on the grill or in a skillet over medium heat until heated through. If you’re working with frozen ones, let them thaw in the fridge overnight first, then reheat the same way for the best texture and flavor.
| Preparation Time | 120-180 minutes |
| Cooking Time | 600-720 minutes |
| Total Time | 720-900 minutes |
| Level of Difficulty | Hard |
| Servings | 10 sausages |
Estimated Nutrition
Estimated nutrition for the whole recipe (without optional ingredients):
- Calories: 4600-5100
- Protein: 280-320 g
- Fat: 390-430 g
- Carbohydrates: 18-24 g
Ingredients
For the sausage base:
- 0.88 lb pork
- 0.66 lb beef
- 0.66 lb pork fat (chilled and cut into 1/2-inch cubes for a better emulsion)
- 0.6 oz salt
- 0.08 oz pink salt
- 1 tablespoon dry milk (for an improved bind)
- 2.5 fl oz ice cold water
- 1 tsp garlic powder
- 0.5 tsp onion powder
- 1/4 tsp ground coriander
- hog casings
For the popper mix-ins:
- 7.5 oz bacon (thick-cut, cooked crisp and chopped into 1/4-inch bits)
- 7 oz cream cheese (cubed into 1/4-inch pieces and partially frozen)
- 4 oz jalapenos (seeded and finely diced into 1/8-inch pieces)
- 1 tsp black pepper
- 0.75 tsp cayenne
- 0.75 tsp smoked paprika
Step 1: Prepare Ingredients and Equipment
- 0.88 lb pork
- 0.66 lb beef
- hog casings
Cut the pork and beef into 1/2-inch cubes and place on a parchment-lined tray in the freezer for at least 2 hours until they reach 32°F-34°F; this cold temperature is crucial for creating a proper emulsion and preventing the fat from smearing during grinding.
Simultaneously, prepare your sausage-making equipment: soak the hog casings in cool water for 30 minutes to soften them, and chill your grinder parts (blade, die, and bowl) in the freezer for at least 1 hour.
I always chill my equipment thoroughly because warm surfaces will cause the meat to warm up too quickly during grinding, which breaks down the fat and results in a greasy, separated sausage.
Step 2: Prepare the Filling Components
- 7.5 oz bacon
- 4 oz jalapenos
- 7 oz cream cheese
While the meat freezes, cook the bacon in a skillet over medium heat until it’s crispy and rendered, about 8-10 minutes; drain it on paper towels and chop into 1/4-inch bits once cooled.
Seed the jalapeños by halving them lengthwise and using a small spoon to scrape out the ribs and seeds (remove as many seeds as you’re comfortable with—they add heat), then finely dice into 1/8-inch pieces and set aside.
Cut the cream cheese into 1/4-inch cubes and place on a small parchment-lined tray in the freezer for at least 1 hour; the cream cheese must be partially frozen so it doesn’t smear into the meat during grinding and instead creates pockets of creamy richness throughout the sausage.
Step 3: Grind and Combine the Sausage Base
- 0.66 lb pork fat
- ground meat mixture
- 7.5 oz chopped bacon
- 4 oz diced jalapeños
- 7 oz frozen cream cheese cubes
- 0.6 oz salt
- 0.08 oz pink salt
- 1 tablespoon dry milk
- 2.5 fl oz ice cold water
- 1 tsp garlic powder
- 0.5 tsp onion powder
- 1/4 tsp ground coriander
- 1 tsp black pepper
- 0.75 tsp cayenne
- 0.75 tsp smoked paprika
Remove the chilled meat, fat, bacon, jalapeños, and frozen cream cheese from the freezer and grind them together using the cold grinder with a 3/16-inch die (or whatever grinding plate produces a medium grind).
Working quickly to keep everything cold, transfer the ground mixture to a chilled mixing bowl.
Add the salt, pink salt, dry milk, garlic powder, onion powder, coriander, black pepper, cayenne, and smoked paprika, then pour in the ice-cold water.
Using a stand mixer fitted with a paddle attachment (or mixing by hand with a wooden spoon), mix on medium speed for 3-5 minutes until the mixture becomes sticky and develops a tacky sheen—this is when the meat proteins begin to bind with the fat and emulsify, creating the proper structure.
Step 4: Stuff and Prepare Sausage Links
- prepared sausage mixture from Step 3
- soaked hog casings
Fit your sausage stuffer with the soaked hog casing, leaving about 4 inches hanging loose to tie off at the end.
Stuff the sausage mixture from Step 3 into the casings with steady, even pressure, filling them until they’re plump but not overstuffed (they should feel firm but not drum-tight).
Divide the long strand into individual links by pinching and twisting at 4-6 inch intervals, then tie off the ends with kitchen twine or use a sausage linker.
As you finish each link, use a sterile needle or pricking tool to poke 2-3 small holes near the top to release any air pockets that can create hollow spots during smoking.
I prefer to work quickly and chill the stuffed sausages for at least 30 minutes before smoking, which helps them hold their shape better during the initial heating phase.
Step 5: Smoke the Sausages Using the Hot-Smoke Method
- prepared and pricked sausage links from Step 4
Place the prepared sausage links on a smoker rack or grid, leaving space between each link for smoke circulation.
Heat your smoker to 100°F and place the sausages inside for 1 hour to allow the casing to dry and form a pellicle (a thin, sticky layer that helps smoke adhere).
Increase the temperature to 125°F, add your choice of mild hardwood smoke (oak, cherry, or apple work well with jalapeños and bacon), and smoke for 1 hour.
Raise the temperature to 145°F and continue smoking for 2 hours, then increase to 155°F and smoke for another 2 hours until the sausages develop a deep mahogany color.
Finally, raise the temperature to 180°F and continue heating until the internal temperature reaches 145°F when measured with a meat thermometer inserted into the thickest sausage, which typically takes another 1-2 hours.
Step 6: Chill and Rest the Sausages
- smoked sausages from Step 5
Remove the smoked sausages from the smoker and immediately place them into a bowl or bath of ice water to rapidly chill them to below 70°F; this stops the cooking process and sets the texture.
Let them sit in the ice bath for 10-15 minutes, then remove and pat dry with paper towels.
Allow the sausages to come to room temperature on a clean surface for about 2 hours before serving or storing; this resting period allows the flavors to meld and the texture to firm up slightly as the meat cools completely.
The sausages can now be sliced and served fresh, or wrapped individually and refrigerated for up to 5 days or frozen for up to 3 months.
Best Smoked Jalapeño Popper Sausage
Ingredients
Method
- Cut the pork and beef into 1/2-inch cubes and place on a parchment-lined tray in the freezer for at least 2 hours until they reach 32°F-34°F; this cold temperature is crucial for creating a proper emulsion and preventing the fat from smearing during grinding. Simultaneously, prepare your sausage-making equipment: soak the hog casings in cool water for 30 minutes to soften them, and chill your grinder parts (blade, die, and bowl) in the freezer for at least 1 hour. I always chill my equipment thoroughly because warm surfaces will cause the meat to warm up too quickly during grinding, which breaks down the fat and results in a greasy, separated sausage.
- While the meat freezes, cook the bacon in a skillet over medium heat until it's crispy and rendered, about 8-10 minutes; drain it on paper towels and chop into 1/4-inch bits once cooled. Seed the jalapeños by halving them lengthwise and using a small spoon to scrape out the ribs and seeds (remove as many seeds as you're comfortable with—they add heat), then finely dice into 1/8-inch pieces and set aside. Cut the cream cheese into 1/4-inch cubes and place on a small parchment-lined tray in the freezer for at least 1 hour; the cream cheese must be partially frozen so it doesn't smear into the meat during grinding and instead creates pockets of creamy richness throughout the sausage.
- Remove the chilled meat, fat, bacon, jalapeños, and frozen cream cheese from the freezer and grind them together using the cold grinder with a 3/16-inch die (or whatever grinding plate produces a medium grind). Working quickly to keep everything cold, transfer the ground mixture to a chilled mixing bowl. Add the salt, pink salt, dry milk, garlic powder, onion powder, coriander, black pepper, cayenne, and smoked paprika, then pour in the ice-cold water. Using a stand mixer fitted with a paddle attachment (or mixing by hand with a wooden spoon), mix on medium speed for 3-5 minutes until the mixture becomes sticky and develops a tacky sheen—this is when the meat proteins begin to bind with the fat and emulsify, creating the proper structure.
- Fit your sausage stuffer with the soaked hog casing, leaving about 4 inches hanging loose to tie off at the end. Stuff the sausage mixture from Step 3 into the casings with steady, even pressure, filling them until they're plump but not overstuffed (they should feel firm but not drum-tight). Divide the long strand into individual links by pinching and twisting at 4-6 inch intervals, then tie off the ends with kitchen twine or use a sausage linker. As you finish each link, use a sterile needle or pricking tool to poke 2-3 small holes near the top to release any air pockets that can create hollow spots during smoking. I prefer to work quickly and chill the stuffed sausages for at least 30 minutes before smoking, which helps them hold their shape better during the initial heating phase.
- Place the prepared sausage links on a smoker rack or grid, leaving space between each link for smoke circulation. Heat your smoker to 100°F and place the sausages inside for 1 hour to allow the casing to dry and form a pellicle (a thin, sticky layer that helps smoke adhere). Increase the temperature to 125°F, add your choice of mild hardwood smoke (oak, cherry, or apple work well with jalapeños and bacon), and smoke for 1 hour. Raise the temperature to 145°F and continue smoking for 2 hours, then increase to 155°F and smoke for another 2 hours until the sausages develop a deep mahogany color. Finally, raise the temperature to 180°F and continue heating until the internal temperature reaches 145°F when measured with a meat thermometer inserted into the thickest sausage, which typically takes another 1-2 hours.
- Remove the smoked sausages from the smoker and immediately place them into a bowl or bath of ice water to rapidly chill them to below 70°F; this stops the cooking process and sets the texture. Let them sit in the ice bath for 10-15 minutes, then remove and pat dry with paper towels. Allow the sausages to come to room temperature on a clean surface for about 2 hours before serving or storing; this resting period allows the flavors to meld and the texture to firm up slightly as the meat cools completely. The sausages can now be sliced and served fresh, or wrapped individually and refrigerated for up to 5 days or frozen for up to 3 months.