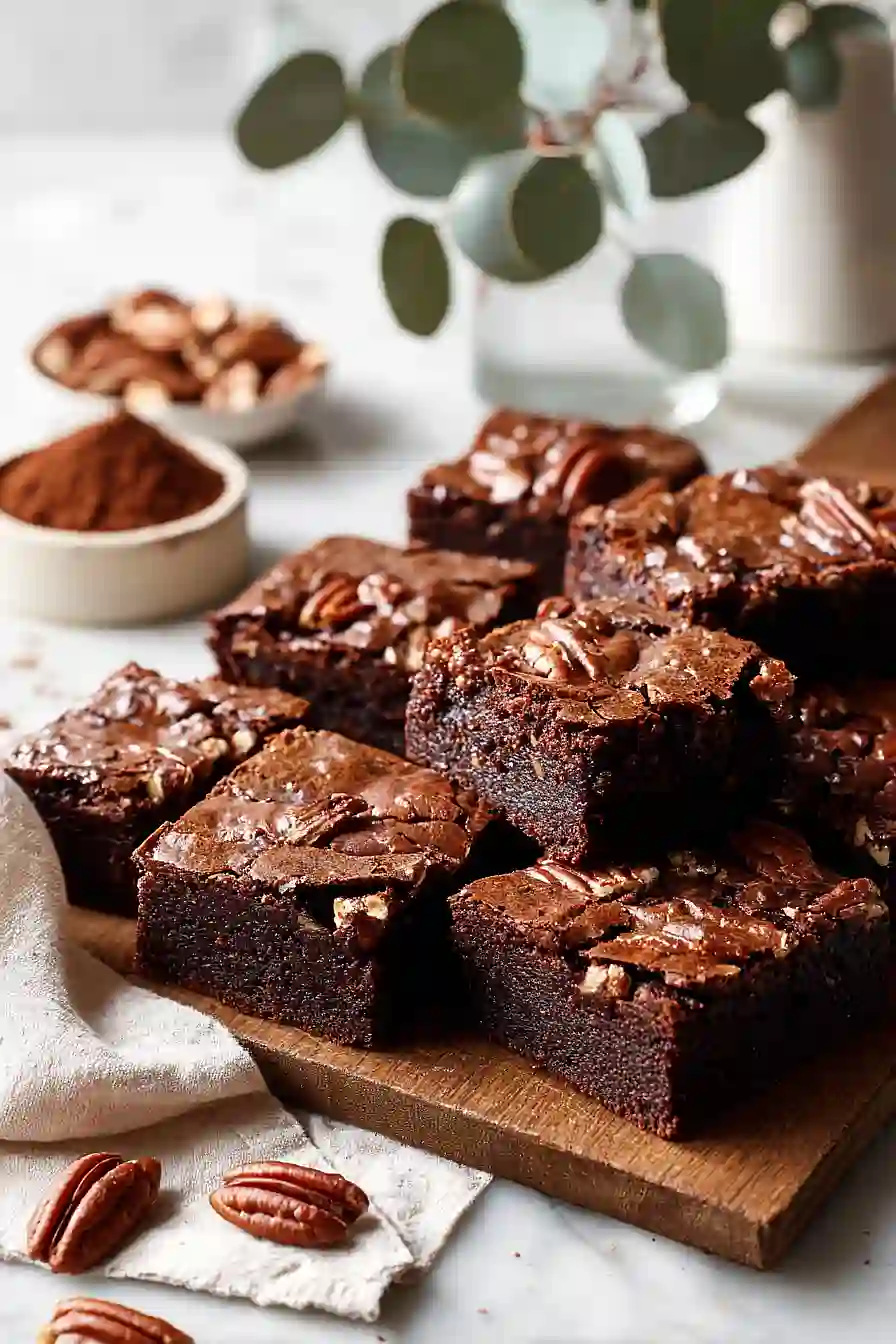
If you ask me, brown butter takes brownies from good to unforgettable.
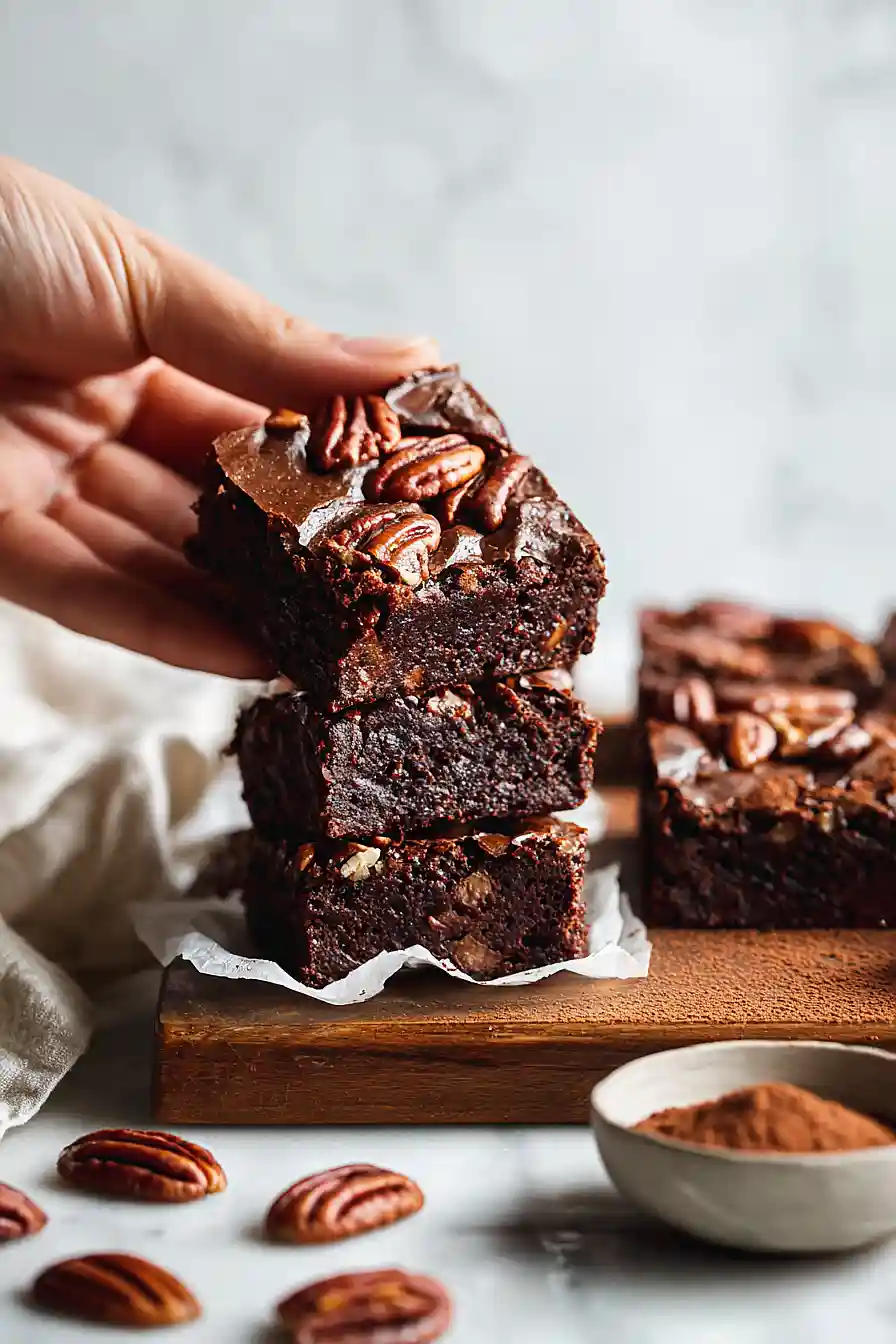
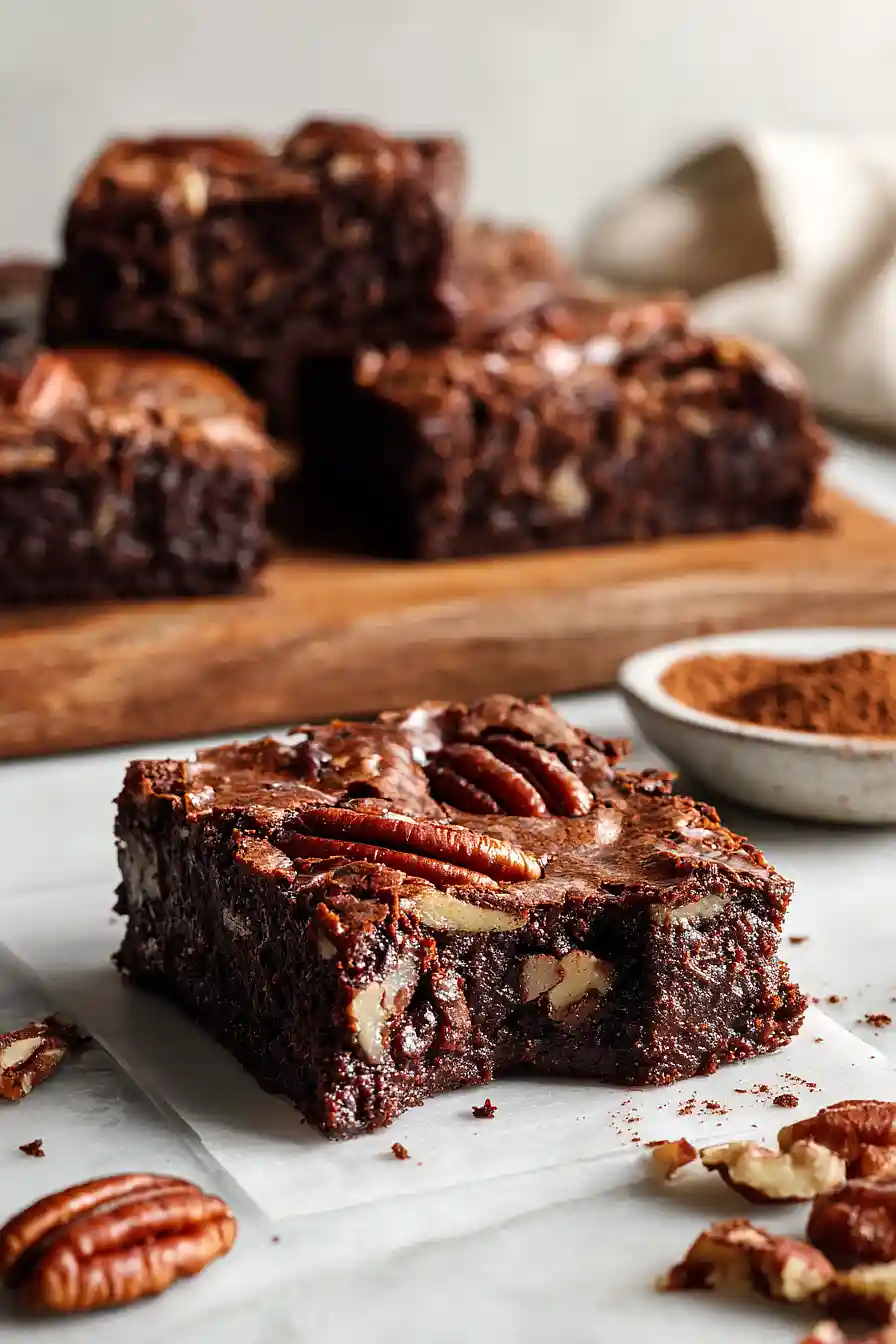
These gluten free brownies are rich, fudgy, and packed with toasted pecans and dark chocolate chunks. The brown butter adds a nutty, caramel-like flavor that makes them taste special without any extra work.
They’re made with simple ingredients like King Arthur gluten free flour, cocoa powder, and brown sugar. The texture is chewy around the edges and soft in the middle, just the way brownies should be.
It’s a recipe that works for everyone at the table, whether they’re gluten free or not.
Why You’ll Love These Gluten Free Brown Butter Brownies
- Rich, nutty flavor – The brown butter adds a deep, caramel-like taste that takes these brownies to the next level without any extra effort.
- Gluten-free friendly – You can enjoy fudgy, decadent brownies without worrying about gluten, and honestly, no one will even know they’re gluten-free.
- Fudgy texture – With dark chocolate and the perfect ratio of ingredients, these brownies come out dense and gooey in the best way possible.
- Simple ingredients – Most of these are pantry staples you probably already have, plus some pecans for a nice crunch.
- Perfect for any occasion – Whether it’s a weeknight dessert craving or something to bring to a party, these brownies always hit the spot.
What Kind of Chocolate Should I Use?
For these brownies, you’ll want to use good quality dark chocolate since it’s one of the main ingredients and really affects the overall flavor. Look for dark chocolate in the 60-70% cacao range – anything higher might make your brownies too bitter, while anything lower won’t give you that rich, deep chocolate taste you’re after. You can use chocolate bars, baking chocolate, or even high-quality chocolate chips, just make sure to chop them into smaller pieces if you’re using a bar so they melt evenly. Stay away from chocolate labeled as “candy coating” or “melting wafers” since those contain different fats and won’t give you the same fudgy texture.
Options for Substitutions
Here are some swaps you can make to work with what you have in your pantry:
- Pecans: Walnuts are a great swap for pecans and give you that same nutty crunch. You can also use almonds or hazelnuts, or skip the nuts altogether if you prefer.
- Dark chocolate: Semi-sweet chocolate chips work just fine here. You can also use a mix of milk and dark chocolate if you want a sweeter brownie.
- Brown sugar: Regular white sugar will work, though you’ll lose some of that caramel-like flavor. If you only have white sugar, add a tablespoon of molasses to get closer to brown sugar’s taste.
- Gluten free flour: Most gluten free flour blends are interchangeable, so use whatever brand you have. Just make sure it’s a 1-to-1 baking blend.
- Xanthan gum: If your gluten free flour blend already contains xanthan gum, skip adding extra. Check the ingredient list on your flour package first.
- Butter: For dairy-free brownies, use vegan butter or coconut oil. Keep in mind that coconut oil won’t give you that brown butter flavor, so you might want to add a touch of vanilla extract.
Watch Out for These Mistakes While Baking
The biggest mistake when making brown butter is not watching it carefully – butter can go from perfectly nutty and amber to burnt in seconds, so stay by the stove and transfer it to a cool bowl immediately when it’s ready.
Overbaking is another common issue with brownies, especially gluten-free ones, since they continue cooking as they cool – pull them out when a toothpick inserted in the center comes out with a few moist crumbs, not completely clean.
Don’t skip the cooling step before cutting, as warm brownies will fall apart and lose their fudgy texture, and make sure your brown butter has cooled to room temperature before adding it to the eggs or you’ll end up with scrambled eggs instead of a smooth batter.
For extra insurance against dry brownies, check them a couple minutes before the recommended time since every oven runs a bit differently.
What to Serve With Gluten Free Brown Butter Brownies?
These rich, fudgy brownies are pretty much perfect on their own, but a scoop of vanilla ice cream on top takes them to the next level. The cold ice cream melting into the warm brownie creates an amazing contrast that everyone loves. If you want to get a little fancy, try serving them with some fresh raspberries or strawberries on the side – the tartness of the berries balances out the sweetness of the chocolate. A glass of cold milk is always a classic pairing, or if you’re serving these to adults, a cup of strong coffee or espresso really brings out the deep chocolate flavor.
Storage Instructions
Store: Keep your brownies in an airtight container at room temperature for up to 4 days, or in the fridge for about a week. I actually prefer them cold from the fridge because they get this amazing fudgy texture that’s hard to resist!
Freeze: These brownies freeze really well for up to 3 months. Cut them into individual squares and wrap each one in plastic wrap, then store them all in a freezer bag. That way you can grab just one or two whenever a chocolate craving hits.
Enjoy: If you froze your brownies, just thaw them at room temperature for about 30 minutes. You can also microwave them for 10-15 seconds if you want that warm, gooey brownie experience again.
| Preparation Time | 40-50 minutes |
| Cooking Time | 20-30 minutes |
| Total Time | 60-80 minutes |
| Level of Difficulty | Medium |
| Servings | 16 pieces |
Estimated Nutrition
Estimated nutrition for the whole recipe (without optional ingredients):
- Calories: 3200-3450
- Protein: 40-48 g
- Fat: 225-245 g
- Carbohydrates: 285-310 g
Ingredients
For the nuts:
- 1.25 cups pecans (toasted and chopped into 1/4-inch pieces)
For the brownie batter:
- 6 oz unsalted butter (I like Kerrygold for its high fat content)
- 8.5 oz dark chocolate (chopped into 1/2-inch chunks)
- 3 eggs (room temperature, about 70°F)
- 0.875 cups brown sugar
- 0.625 cups gluten free flour (I always use King Arthur Measure for Measure)
- 4 tbsp cocoa powder (sifted to remove lumps)
- 0.5 tsp xanthan gum
- 0.75 tsp salt
- 1 tsp vanilla extract
Step 1: Toast Pecans and Prepare Your Workspace
- 1.25 cups pecans
Preheat your oven to 350°F and spread the pecans on a baking sheet.
Toast for 8-10 minutes, stirring halfway through, until fragrant and lightly browned.
Remove from the oven and let cool completely on the sheet—this takes about 5 minutes.
Once cooled, chop the pecans into roughly 1/4-inch pieces and set aside.
While the pecans cool, line your 9×13 inch baking pan (or 8×8 inch for thicker brownies) with parchment paper, leaving some overhang on the sides for easy removal later.
Step 2: Brown the Butter and Melt the Chocolate
- 6 oz unsalted butter
- 8.5 oz dark chocolate
Cut the butter into a few pieces and place in a small saucepan over medium heat.
Let it melt and continue cooking for 6-8 minutes, swirling the pan occasionally, until the milk solids turn a deep amber color and smell nutty—this is where the magic happens for flavor.
Pour the browned butter into a bowl and set aside to cool slightly.
While the butter cools, finely chop the dark chocolate into 1/2-inch chunks and place in a microwave-safe bowl.
Microwave in 20-second intervals, stirring between each interval, until completely melted and smooth.
Let the chocolate cool for a few minutes while you proceed.
Step 3: Lower Oven Temperature and Whip Eggs with Sugar
- 3 eggs
- 0.875 cups brown sugar
Reduce your oven temperature to 320°F now so it’s ready when you need it.
In a large mixing bowl, combine the room-temperature eggs and brown sugar.
Using an electric mixer on medium-high speed, whip for 5-7 minutes until the mixture is pale, fluffy, and has roughly tripled in volume—this incorporates air that gives brownies their tender crumb.
I find room-temperature eggs whip more efficiently and create more volume, which is important for gluten-free baking where we need all the structure we can get.
Step 4: Combine Wet Ingredients
- browned butter from Step 2
- melted chocolate from Step 2
Pour the cooled browned butter into the whipped egg mixture and fold gently with a spatula until no streaks of butter remain.
Then add the cooled melted chocolate and fold until fully incorporated and the batter is uniformly dark.
Don’t overmix at this stage—you want to maintain the airiness you just created.
Step 5: Sift and Mix Dry Ingredients, Then Fold Into Batter
- 0.625 cups gluten free flour
- 4 tbsp cocoa powder
- 0.5 tsp xanthan gum
- 0.75 tsp salt
- 1 tsp vanilla extract
In a separate small bowl, sift together the gluten-free flour, cocoa powder, xanthan gum, salt, and vanilla extract.
Sifting the cocoa powder removes any lumps and ensures even distribution of the xanthan gum, which helps bind the batter in place of gluten.
Add this dry mixture to the wet ingredients from Step 4 and fold gently with a spatula until just combined—stop folding as soon as you don’t see any streaks of flour.
Overmixing develops gluten-free flour differently and can make brownies tough instead of fudgy.
Step 6: Add Pecans and Transfer to Pan
- toasted pecans from Step 1
- batter from Step 5
Fold most of the toasted pecans (reserve about 2 tablespoons for topping) into the batter until evenly distributed.
Pour the batter into your prepared pan and spread into an even layer.
Sprinkle the reserved pecans across the top, pressing them gently into the surface so they stay in place during baking.
Step 7: Bake and Cool
Bake at 320°F for 20-22 minutes if you prefer gooey, fudgy brownies with a slight jiggle in the center, or 24-26 minutes for denser, fully set brownies.
The center should still look slightly underbaked when you remove the pan—brownies continue cooking slightly from residual heat as they cool.
Let them cool completely in the pan at room temperature (this takes about 1-2 hours), then use the parchment paper overhang to lift them out and transfer to a cutting board.
Cut into squares with a sharp knife, wiping the blade between cuts for clean edges.
Classic Gluten Free Brown Butter Brownies
Ingredients
Method
- Preheat your oven to 350°F and spread the pecans on a baking sheet. Toast for 8-10 minutes, stirring halfway through, until fragrant and lightly browned. Remove from the oven and let cool completely on the sheet—this takes about 5 minutes. Once cooled, chop the pecans into roughly 1/4-inch pieces and set aside. While the pecans cool, line your 9x13 inch baking pan (or 8x8 inch for thicker brownies) with parchment paper, leaving some overhang on the sides for easy removal later.
- Cut the butter into a few pieces and place in a small saucepan over medium heat. Let it melt and continue cooking for 6-8 minutes, swirling the pan occasionally, until the milk solids turn a deep amber color and smell nutty—this is where the magic happens for flavor. Pour the browned butter into a bowl and set aside to cool slightly. While the butter cools, finely chop the dark chocolate into 1/2-inch chunks and place in a microwave-safe bowl. Microwave in 20-second intervals, stirring between each interval, until completely melted and smooth. Let the chocolate cool for a few minutes while you proceed.
- Reduce your oven temperature to 320°F now so it's ready when you need it. In a large mixing bowl, combine the room-temperature eggs and brown sugar. Using an electric mixer on medium-high speed, whip for 5-7 minutes until the mixture is pale, fluffy, and has roughly tripled in volume—this incorporates air that gives brownies their tender crumb. I find room-temperature eggs whip more efficiently and create more volume, which is important for gluten-free baking where we need all the structure we can get.
- Pour the cooled browned butter into the whipped egg mixture and fold gently with a spatula until no streaks of butter remain. Then add the cooled melted chocolate and fold until fully incorporated and the batter is uniformly dark. Don't overmix at this stage—you want to maintain the airiness you just created.
- In a separate small bowl, sift together the gluten-free flour, cocoa powder, xanthan gum, salt, and vanilla extract. Sifting the cocoa powder removes any lumps and ensures even distribution of the xanthan gum, which helps bind the batter in place of gluten. Add this dry mixture to the wet ingredients from Step 4 and fold gently with a spatula until just combined—stop folding as soon as you don't see any streaks of flour. Overmixing develops gluten-free flour differently and can make brownies tough instead of fudgy.
- Fold most of the toasted pecans (reserve about 2 tablespoons for topping) into the batter until evenly distributed. Pour the batter into your prepared pan and spread into an even layer. Sprinkle the reserved pecans across the top, pressing them gently into the surface so they stay in place during baking.
- Bake at 320°F for 20-22 minutes if you prefer gooey, fudgy brownies with a slight jiggle in the center, or 24-26 minutes for denser, fully set brownies. The center should still look slightly underbaked when you remove the pan—brownies continue cooking slightly from residual heat as they cool. Let them cool completely in the pan at room temperature (this takes about 1-2 hours), then use the parchment paper overhang to lift them out and transfer to a cutting board. Cut into squares with a sharp knife, wiping the blade between cuts for clean edges.